There’s something about the smell of toasted coconut that just stops you in your tracks. It’s like beach vacations and Grandma’s kitchen got together and baked you a memory. I still remember the first time I burned coconut in the oven—opened the door, and poof! A plume of smoke and a faceful of disappointment. Lesson learned: always stir mid-toast and never trust a timer blindly. But when you get it right? That golden, nutty crunch on top of a silky coconut cream pie is nothing short of magic.
And don’t get me started on the meringue. Soft peaks, stiff peaks, weepy whites… If you know, you know. But today, let’s get it all right—the filling, the crust, the cloud-like topping—and make the kind of pie that vanishes before the coffee is even poured.
Why Coconut Cream Pie Feels Like Home
Coconut cream pie is that sweet spot between comfort food and showstopper. It’s not just a dessert—it’s a moment. You bring it to potlucks and suddenly you’re getting texts from cousins you haven’t seen in years. It’s one of those old-school treats that feels both nostalgic and fresh when you serve it cold on a summer day.
Plus, there’s something about that silky filling, thickened to perfection, that feels like a culinary hug. The kind that tells you it’s okay to have a second slice…or a third.
The Secret’s in the Microwave (Yes, Really)
Let’s bust a myth right here: great pie filling does not require you to sweat over the stove. You can absolutely make the pudding base for this pie in the microwave. In fact, it’s better—no scorched milk, no sticky-bottomed saucepan, and you don’t have to babysit it.
Just combine evaporated milk, sugar, cold water, beaten egg yolks (a.k.a. “yellows” if you’re like my family), and cornstarch in a large batter bowl. Microwave for 3 minutes, stir, then microwave for another 4. You’re looking for thick, creamy, smooth—like glossy custard that makes your spoon stand at attention.
“Microwave pudding? Girl, that’s a life-changer.” — My neighbor after trying it.
It’s practically foolproof. And it saves your arms for more important things, like whipping meringue.
The Coconut: Toasted, Generous, and Non-Negotiable
Here’s the thing. If you’re not toasting your coconut for this pie, you’re missing out on half the flavor. Whether it’s in the oven or the air fryer, toast it until it’s golden brown and smells like heaven.
I like to use a lot of coconut in the filling. That’s what makes it actually taste like coconut cream pie and not just sweet custard with a tropical daydream. Toasted coconut adds texture and brings out the natural oils, which deepen the flavor. Sprinkle some inside, and save a little extra for that iconic top layer.
Meringue: Don’t Let It Weep
Ah, meringue. That glossy topper that can go from cloud to disaster if you so much as breathe on it wrong. One big rule: separate your eggs cleanly. Not even a smidge of yolk can make it in, or your whites won’t whip.
A neat trick if you’re not confident with the shell-separation game? Use your fingers like a strainer. Hold the yolk gently and let the whites slip through. It’s oddly satisfying and works better than any gadget.
Now here’s the kicker: always spread meringue on hot filling. It helps the whites cook more evenly and reduces weeping. Also, adding a touch of cornstarch to your sugar stabilizes the meringue and gives you those stiff peaks we dream about.
Bake Smart: Golden Meringue, Not Burnt Coconut
When it’s time to bake, do it in stages. Get your meringue golden first, then sprinkle on toasted coconut halfway through the baking time so it doesn’t burn. About 10 minutes in, open the oven and gently toss that golden snow on top. Bake for another 10.
Once out, let it cool to room temp before refrigerating. Don’t rush it. This pie sets up best with a little patience and a cool fridge.
Funny Things That Happen While Making Pie
- I once tried using unsweetened coconut and spent 20 minutes wondering why my pie tasted like cardboard. Rookie mistake.
- Another time, I whipped meringue with a spoon. (Don’t ask.) Let’s just say the “peaks” were more like puddles.
- And once, I left the pie on the windowsill to cool like in cartoons… and a squirrel took a bite. He looked impressed though.
3 Mistakes to Avoid With Coconut Cream Pie
- Not toasting the coconut. Seriously. Don’t skip it.
- Adding meringue to a cold filling. That’s a surefire way to get soggy and sad.
- Using the wrong milk. Stick with evaporated for that old-fashioned richness. Don’t swap it for regular unless you want a runny mess.
5 Fun Twists on Coconut Cream Pie
- Chocolate crust. Use a chocolate cookie crust instead of classic pie crust.
- Boozy coconut cream. Stir in a splash of dark rum to the filling for a grown-up kick.
- Coconut-almond combo. Add sliced almonds to the topping and a hint of almond extract to the custard.
- Mini pies. Bake the filling into tart shells for bite-size treats.
- Frozen version. Pour the whole thing into a graham cracker crust and freeze it—hello, summer pie.
A Bite of History: Coconut Cream Pie’s Rise
Coconut cream pie first gained traction in the U.S. during the early 1900s when coconut became more available thanks to imports from the Philippines. It hit its stride in the ’50s and ’60s as a staple diner dessert, usually perched in a revolving glass display next to banana pudding and cherry pie.
It’s remained beloved because it’s just that good. It whispers of vintage charm while still holding its own next to trendier desserts like lava cake and tiramisu.
Regional Love: Coconut Cream Pie Across the Map
- The South adds a hint of bourbon and serves it with sweet tea.
- The Midwest likes it mile-high, with an extra egg white or two for the meringue.
- California swaps the meringue for whipped cream and sometimes tosses in macadamia nuts.
- Hawaii? They go wild and drizzle passionfruit syrup on top. It’s pie meets luau.
Storage Tips (Because You Will Have Leftovers)
Okay, maybe not. But if by some miracle you do:
- Store in the fridge, loosely covered with plastic wrap.
- It keeps for up to 3 days (but good luck making it last that long).
- Don’t freeze it—custard doesn’t thaw gracefully. You’ll end up with watery filling and sad crust.
One Last Thing…
When I cut into this pie and that custard holds its shape just right, coconut glistening under a golden pillow of meringue, I remember why I love baking in the first place. It’s not just about dessert—it’s about feeding people something made with love. Something that says, “Hey, I thought of you.”
So go ahead. Toast the coconut. Whip the whites. Let the pie cool while you clean up the counter. And when it’s time to slice—don’t forget to grab the first one for yourself.
You earned it.
Print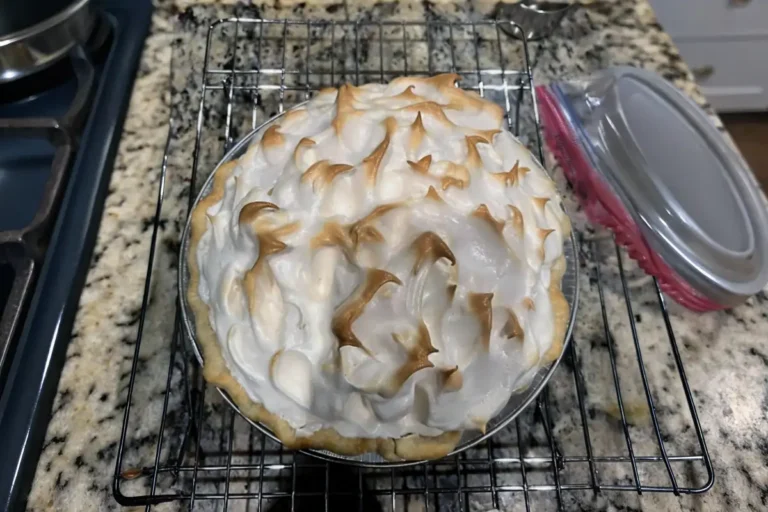
Coconut Meringue Pie with 3-Ingredient Magic Crust
A creamy coconut custard tucked into a buttery crust, topped with fluffy golden meringue and plenty of toasted coconut. This pie brings vintage diner vibes with a shortcut crust and microwave-friendly filling.
- Total Time: 45 minutes
- Yield: One 9-inch pie
Ingredients
Coconut custard made with egg yolks, evaporated milk, sugar, cornstarch, butter, and lots of toasted coconut.
Golden meringue whipped from egg whites, sugar, cream of tartar, and a touch of cornstarch.
Easy magic crust using crushed graham crackers or cookie crumbs, melted butter, and sugar (or a pre-baked shell if you’re in a rush).
Instructions
Start by toasting your coconut in the oven or air fryer until golden.
Whisk together evaporated milk, sugar, egg yolks, cornstarch, and cold water.
Microwave the mixture in a large bowl, stirring halfway through, until thick and glossy.
Stir in butter, vanilla, and a big scoop of toasted coconut.
Pour into your crust while hot.
Whip egg whites with sugar, cream of tartar, and a little cornstarch until stiff peaks form.
Spread meringue over the hot filling, sealing edges well.
Bake until golden, sprinkling on extra toasted coconut halfway through.
Cool completely, then chill before slicing.
Notes
– Always add meringue while the filling is hot to help it cook through and prevent weeping.
– Cold eggs are easier to separate cleanly than room temp.
– Don’t rush chilling—this pie slices best after several hours in the fridge.
- Prep Time: 25 minutes
- Cook Time: 20 minutes
- Category: Dessert
- Method: Microwave & Baked
- Cuisine: American

