Ever wondered why some meals just hit different? Picture this: a warm summer evening, the faint sound of sizzling, and the irresistible aroma of a perfectly cooked steak wafting through the air. That’s the magic of grilling done right. 🥩
This guide is your ticket to turning your backyard into a steakhouse. No fluff, no fuss—just a step-by-step walkthrough to achieve that juicy, flavorful masterpiece. From picking the right cut (ribeye, anyone?) to nailing the sear, we’ve got you covered.
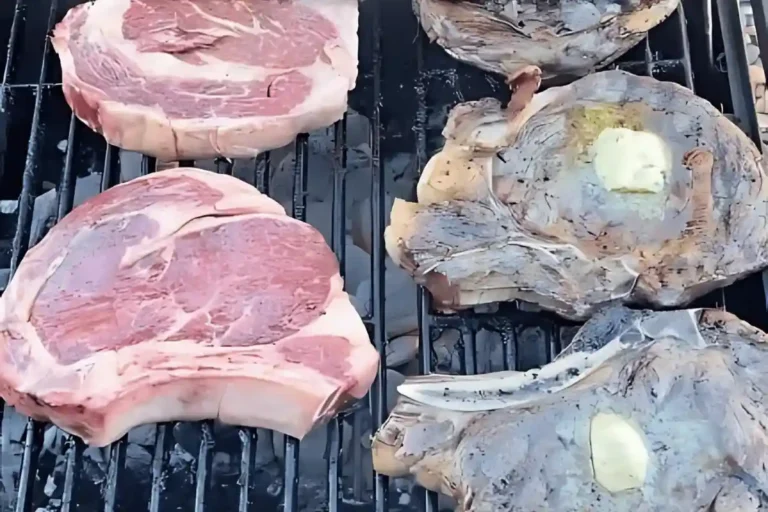
But here’s the secret sauce: quality ingredients. A dollop of herb butter can take your steak from good to “can I get seconds?” status. Plus, we’re spilling some pro tips to make your grilling game unbeatable. Ready to level up? Let’s fire up that grill.
Introduction to the Ultimate GRILLED STEAK Guide
What makes a meal unforgettable? It’s all in the details. This guide is your roadmap to mastering the art of cooking a perfect steak on the grill. From seasoning to searing, we’ll break it down step by step.
Key Concepts and Objectives
First things first: timing is everything. Whether it’s letting your meat sit at room temperature or monitoring the grill’s heat, every minute counts. Here’s what you’ll learn:
- How to season like a pro—salt and steak seasoning are your best friends.
- The importance of creating two heat zones on your grill for even cooking.
- Why letting your steak rest after cooking is non-negotiable for maximum juiciness.
Essential Equipment for Perfect Steak Grilling
Grilling perfection starts with the right tools—let’s break it down. Whether you’re a weekend warrior or a seasoned pro, having the best equipment can make all the difference. From the grill itself to the gadgets that ensure precision, here’s what you need to know.
Choosing the Right Grill and Thermometer
First up: the grill. Gas grills are convenient and easy to control, perfect for quick weeknight meals. On the other hand, a charcoal grill delivers that unbeatable smoky flavor, ideal for weekend feasts. The choice depends on your cooking style and patience level.
Next, don’t skimp on a digital thermometer. It’s the secret weapon for hitting the perfect internal temperature every time. As ChefSofi says, “Guessing doneness is a rookie move—use a thermometer.”
- Gas Grill: Quick, consistent heat for hassle-free cooking.
- Charcoal Grill: Adds a smoky depth to your meal.
- Digital Thermometer: Ensures precision and avoids overcooking.
Pro tip: Create two heat zones on your grill—one for searing and one for finishing. This technique, recommended by Nick Evans, ensures even cooking and prevents burning.
Lastly, note that seasoning is key. A teaspoon of the right mix can elevate your dish from good to gourmet. With the right tools and a bit of practice, you’ll be grilling like a pro in no time.
Step-by-Step Preparation: Seasoning and Herb Butter
Ready to unlock the flavor secrets of a killer meal? It’s all in the seasoning and butter. Whether you’re a spice enthusiast or a butter aficionado, these two elements are the unsung heroes of a delicious dish. Let’s dive in!
Homemade Steak Seasoning Recipe
Forget store-bought blends—homemade seasoning is where it’s at. Start with 3/4 tablespoon of rock salt and 1 1/2 teaspoons of whole black peppercorns. Crush them using a mortar and pestle or an electric spice grinder for that fresh, bold flavor.
Add 1/2 teaspoon of dried minced garlic, 1/2 teaspoon of dried minced onion, and a pinch of fennel seeds for a hint of sweetness. Finish with a dash of red chili pepper flakes for a subtle kick. Mix it all up, and you’ve got a seasoning blend that’s pure magic.
Crafting Compound Herb Butter
Now, let’s talk butter. A dollop of herb butter can turn a good meal into a “wow, can I get the recipe?” moment. Start with 1 stick of salted butter (that’s 1/2 cup) at room temperature. This makes it easier to mix in the good stuff.
Add 1 tablespoon of finely minced fresh rosemary, 1 tablespoon of thyme, and 2 tablespoons of chopped parsley. Don’t forget a clove of garlic for that extra punch. Mix it all together, and you’ve got a butter that’s bursting with flavor. Pro tip: Roll it into a log using plastic wrap and chill it for easy slicing later.
With these two recipes in your arsenal, you’re ready to take your cooking game to the next level. Let’s get seasoning!
Creating Two Heat Zones on Your Grill
Want to know the secret to grilling like a pro? It’s all about mastering the art of two heat zones. This technique gives you control over your cooking, ensuring every bite is perfection.
Direct vs. Indirect Heat Explained
Direct heat is your go-to for searing. It’s high and fast, giving that crispy crust everyone loves. Indirect heat, on the other hand, is gentle and slow, perfect for finishing your dish without burning it. Together, they’re a match made in grilling heaven.
Setting up two zones is simple. For a charcoal grill, pile the coals on one side. For a gas grill, turn on only half the burners. This creates a hot side for searing and a cooler side for even cooking. Pro tip: Preheat your grill for at least 15 minutes to get the right temperature.
Why does this matter? Direct heat locks in flavor, while indirect heat ensures your meal cooks evenly. A few extra degrees can make the difference between a juicy masterpiece and a dry disappointment. As one grilling expert puts it,
“Two zones give you the best of both worlds—crispy on the outside, tender on the inside.”
Monitoring internal temperature is key. Use a thermometer to check for doneness. For example, a perfect medium-rare is around 130°F. Remember, a little extra time on the cooler side can save your dish from overcooking.
So, next time you fire up the grill, think zones. It’s the trick that separates the amateurs from the pros. Happy grilling!
Searing Techniques to Achieve a Restaurant-Style Crust
Achieving that golden crust isn’t magic—it’s science and timing. The sear is what transforms a good meal into a masterpiece. Here’s how to nail it every time.
How to Get the Perfect Grill Marks
Want those envy-inducing grill marks? Start with a preheated grill at 400-450°F. Place your meat diagonally on the grates and let it sit for 60-90 seconds. Flip it at a 90-degree angle for the classic crosshatch pattern. Pro tip: Don’t move it around—patience is key. 🕒
For a charcoal grill, pile the coals on one side for intense heat. This ensures a quick sear without overcooking. As one grill master puts it,
“The crust is the crown jewel of a great steak.”
Timing and Temperature Tips
Timing is everything. Sear each side for 4-5 minutes, flipping every 60-90 seconds. This ensures even cooking and prevents burning. Use a digital thermometer to check the internal temperature. For medium-rare, aim for 130°F.
After searing, move your meat to the cooler side of the grill to finish cooking. This balances the exterior’s crispness with the interior’s juiciness. Remember, resting it for 5-10 minutes locks in the flavor. As ChefSofi says,
“Resting is non-negotiable for a juicy bite.”
| Step | Tip |
|---|---|
| Preheat Grill | Set to 400-450°F for optimal searing. |
| Grill Marks | Flip at 90-degree angles for crosshatch patterns. |
| Timing | Sear 4-5 minutes per side, flipping every 60-90 seconds. |
| Temperature | Use a thermometer; aim for 130°F for medium-rare. |
| Resting | Let it rest for 5-10 minutes for maximum juiciness. |
With these tips, you’re ready to sear like a pro. Fire up that grill and get cooking!
Mastering Steak Doneness: Temperatures and Timing
Timing and temperature are the unsung heroes of a great meal. Whether you’re aiming for a melt-in-your-mouth medium-rare or a well-done masterpiece, hitting the right internal temperature is key. Let’s break it down so you can cook like a pro every time.
Internal Temperature Guide
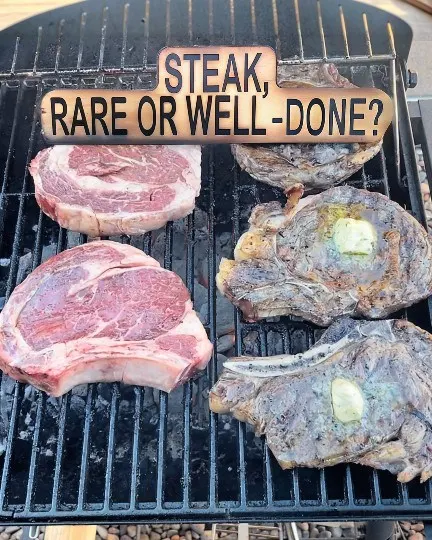
Here’s the deal: every doneness level has its sweet spot. Use a digital thermometer to check the thickest part of the meat, avoiding bones or fat. Here’s the breakdown:
- Rare: 120-125°F (bright red center)
- Medium-rare: 130-135°F (warm red center)
- Medium: 140-145°F (pink center)
- Medium-well: 150-155°F (slightly pink center)
- Well-done: 160°F and above (no pink)
Pro tip: The USDA recommends cooking to 145°F for safety, but carryover cooking will add 5-10 degrees after you remove it from heat. 🕒
Letting Your Steak Rest
Here’s the secret to juiciness: let steak rest for 5-10 minutes after cooking. This allows the juices to redistribute, ensuring every bite is tender and flavorful. Skipping this step? Big mistake. As one grill master puts it,
“Resting is non-negotiable for a juicy bite.”
So, set a timer, grab a drink, and let your masterpiece chill. You’ll thank yourself later.
Troubleshooting Common Grilling Challenges
Grilling can be a breeze—until it’s not. Let’s tackle the hiccups. From flare-ups to uneven heat, we’ve got the fixes to keep your cookout on track. Here’s how to handle the most common grilling woes like a pro.
Flare-Ups from Fat: Nothing kills the vibe faster than flames shooting up. Excess fat dripping onto the coals is usually the culprit. To avoid this, trim excess fat before cooking or move your meat to the cooler side of the grill until the flames die down. Pro tip: Keep a spray bottle of water handy for emergencies.
Uneven Cooking: One side burnt, the other raw? It’s a classic grilling fail. The solution? Two-zone grilling. Create a hot side for searing and a cooler side for finishing. This gives you control over the internal temperature and prevents overcooking. As one grill master puts it,
“Two zones are your secret weapon for even cooking.”
Sticking Food: If your meat is clinging to the grates, it’s likely because they weren’t preheated. Always heat your grill for 5-10 minutes before adding food. A light coat of oil on the grates can also help.
Overcooking: Timing is everything. Use a digital thermometer to monitor the internal temperature and avoid guesswork. For medium-rare, aim for 130°F. Remember, carryover cooking will add a few degrees after you remove it from the heat. 🕒
Pro Tips to Save the Day:
- Keep the lid closed as much as possible to maintain consistent heat.
- Adjust the vents on a charcoal grill to control airflow and temperature.
- Let your meat rest for 5-10 minutes after cooking to lock in juices.
With these tips, you’ll be ready to handle any grilling curveball. Fire up that grill and get cooking! 🔥
Maximizing Flavor with Garlic, Herbs, and Spices
Garlic is the MVP of flavor. Whether minced, roasted, or powdered, it adds depth to any dish. Pair it with fresh herbs like rosemary, thyme, or parsley for a flavor explosion. Pro tip: Make a garlic herb sauce for basting—it’s a game-changer.
Don’t underestimate the power of seasoning. A homemade blend of salt, pepper, and spices can transform an ordinary meal into a showstopper. Add a pinch of smoked paprika or chili flakes for a subtle kick. As one chef puts it,
“Seasoning is the unsung hero of great cooking.”
Here are some creative twists to try:
- Use a herb brush to apply melted butter for extra flair.
- Mix garlic and herbs into a compound butter for a rich, savory finish.
- Pair your dish with a fresh salad tossed in a light herb dressing for balance.
Strategic seasoning and basting can turn a simple meal into a culinary masterpiece. So, grab your herbs, fire up the grill, and let the flavor magic begin!
Serving Suggestions and Complementary Side Recipes
Let’s talk about the unsung heroes of any great meal—the sides. A perfectly cooked dish deserves companions that elevate the experience. From creamy mashed potatoes to a crisp salad, the right side can turn a meal into a feast. Here’s how to round out your plate like a pro.
Pairing Sides for a Complete Meal
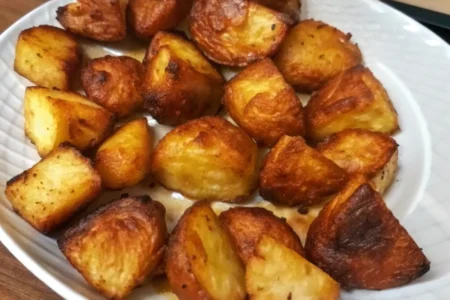
First up: mashed potatoes. Add a dollop of garlic herb butter for a rich, savory twist. Or, go bold with a cheesy potato gratin. Pro tip: Prep these ahead of time to save stress. 🕒
For a lighter option, try a fresh salad. Think crisp greens, roasted veggies, and a tangy vinaigrette. It’s the perfect balance to a hearty main dish. As one foodie puts it,
“A good salad is like a breath of fresh air on your plate.”
Craving something indulgent? Creamed spinach or mac and cheese are crowd-pleasers. Add a sprinkle of smoked paprika or a dash of hot sauce for extra flair.
Here are some quick ideas to inspire your next meal:
- Grilled veggies: Zucchini, bell peppers, and asparagus are easy and flavorful.
- Sweet corn: A summer classic that pairs perfectly with any dish.
- Garlic bread: Because who doesn’t love carbs?
When it comes to plating, keep it simple. Arrange your sides around the main dish for a family-style vibe. Add a sprig of fresh herbs for a pop of color.
With these tips, your next meal will be Instagram-worthy and delicious. So, grab your apron, fire up the grill, and let’s get cooking!
Conclusion
Mastering the art of cooking beef is all about precision and patience. From seasoning with the right amount of salt and pepper to searing at the perfect temperature, every step counts. Letting your meat come to room temperature before cooking ensures even heat distribution, while resting it afterward locks in those juicy flavors.
Remember, the right equipment—like a reliable thermometer—can make all the difference. Whether you’re aiming for medium rare or well-done, monitoring the internal temperature is non-negotiable. Pro tip: Don’t skip the resting period. It’s the secret to a tender, flavorful bite.
Feel free to experiment with seasoning blends and herb butters to make each dish uniquely yours. Cooking is as much about creativity as it is about technique. So, fire up that grill, trust the process, and enjoy the delicious results.
Got a favorite steak recipe or a grilling hack? Share it in the comments or tag us on social media. Let’s keep the conversation sizzling!

